
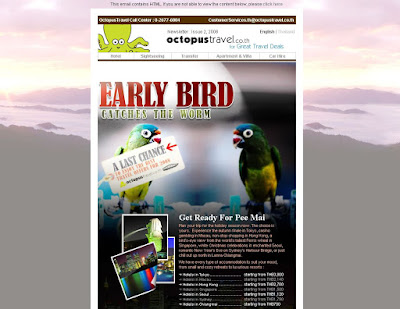
Happy New Year E-card for Justtour. 既然幫Vijaya Tour做了E-card,對於平常也很幫忙的大將(Justtour)旅行社,我也很不吝嗇的做了一個E-card給他們:「頌春」。春天是希望的開始,獻上兩朵美麗的紅色鬱金香,讚頌即將降臨的春天!也希望春天能帶給我們更多而新的「生意」,快讓我們的經濟好起來吧!全民都大賺錢!


#theDiv {也許CSS有其它方法能做到類似的功能,不過這個方法算是滿簡單易懂的就是了。
height: 450px; /* div的高度 */
width: 800px;/* div的寬度 */
position: absolute;
top: 50%;
left: 50%;
margin: -225px 0 0 -400px;/* 邊界減去一半的寬高 */
}
.gif)


<links>AS3的程式碼如下:
<title link="http://www.homepage.com/promotion.htm">
The Promotion</title>
</links>
import flash.net.URLRequest;
import flash.events.MouseEvent;
var myXML:XML;
var myLoader:URLLoader = new URLLoader();
myLoader.load(new URLRequest("my-xml-file.xml"));
myLoader.addEventListener(Event.COMPLETE, processXML);
var promotionLinkAttribute:XMLList;
function processXML(e:Event):void {
myXML = new XML(e.target.data);
promotionLinkAttribute = myXML.title[0].attribute("link");
}
senser.buttonMode=true;
senser.addEventListener(MouseEvent.MOUSE_OVER, hoverPromotionBanner);
senser.addEventListener(MouseEvent.MOUSE_OUT, visitedPromotionBanner);
senser.addEventListener(MouseEvent.CLICK, openPromotionPage);
function hoverPromotionBanner(e:MouseEvent):void{
MovieClip(getChildByName("senser")).gotoAndPlay("active");
this.gotoAndStop(currentFrame);
}
function visitedPromotionBanner(e:MouseEvent):void{
MovieClip(getChildByName("senser")).gotoAndPlay("visited");
this.play();
}
function openPromotionPage(e:MouseEvent):void {
var promotionLink:URLRequest = new
URLRequest(promotionLinkAttribute);
navigateToURL(promotionLink, "_self");
//trace(promotionLinkAttribute);
}
import gs.*;
var myTween:TweenMax = new TweenMax(mc, 2, {x:500, y:200});
//then later, if you need to change the tween
//so that the "x" property tweens to 100 instead of 500...
myTween.setDestination("x", 100);
//even if the tween is in progress, the value will be updated
var myLoader:URLLoader = new URLLoader();
var myRequest:URLRequest = new URLRequest("context.txt");
myLoader.load(myRequest);
myLoader.addEventListener(Event.COMPLETE, loadText);
function loadText(e:Event):void {
myText.text = myLoader.data;
}
position:static; z-index:999;結果,發現…根本就沒有任何作用!難不成得在Flash裡面加上 position:static; z-index:-1; 這樣的屬性嗎?仍然是一個完全無效的結果…ap4a有一篇文章可以參考: Z-index Oddities: Menu dropdowns overlapped by positioned elements,但在目前的狀況下,似乎幫助不大。
<param name="wmode" value="transparent">在 embed 標籤裡再加入底下的參數:
wmode="transparent"沒想到這樣就解決我的問題了!棒!Adobe針對Flash Object與Embed標籤的屬性也有做詳細的說明。事實上,不一定只有將 wmode 的參數值設成 Transparent(透明) 才行,其實 Opaque(不透明) 也可以!所以只要設定透明度,不論是否透明,都能有效解決這個問題。(設成 window 則是肯定不行!因為我試過了~)

1. Photoshop的Layer Camp功能[ 說明 ]
2. Fireworks的分享圖層功能
3. 直接把Photoshop的PSD檔拉進Dreamweaver裡
1. 使用正確的網頁文件格式(Doc-Type)[ 說明 ]
2. 從一開始設計網頁就用Dreamweaver提供的CSS起始版面(CSS Starter Layout)
3. 養成「先按一下Element Inspector,然後再按左、右鍵」的習慣
4. 雙擊工作視窗的標題列就可以將該工作視窗最大化
5. Dreamweaver的尺規工具
6. 使用EM而不要用PX來做為文字的單位
7. 方塊理論(Box Model)
8. 從Photoshop複製,然後直接在Dreamweaver貼上
9. 浮動(Float)的屬性:先往上靠齊,然後才向左或向右
10.用Dreamweaver直接調整CSS
11.用Dreamweaver內建的SPRY來建構標準的Ajax頁面
12.在同一個標籤裡使用多個「類別(Class)」
13.絕對不要一開始就在IE裡檢查你的網頁
14.IE修正碼「[if IE lte7]」
This is Lorem Ipsum, This is Lorem Ipsum, This is Lorem Ipsum, This is Lorem Ipsum, This is Lorem Ipsum, This is Lorem Ipsum, This is Lorem Ipsum, This is Lorem Ipsum, This is Lorem Ipsum, This is Lorem Ipsum, This is Lorem Ipsum, This is Lorem Ipsum, This is Lorem Ipsum, This is Lorem Ipsum, This is Lorem Ipsum不斷的重複文字來當作你的假字內容,但你會發現,這些This is Lorem Ipsum太假了,一下子就被發現是「很假」的假字!
Sed id dolor. In hac habitasse platea dictumst. Maecenas diam ligula, vulputate vitae, mollis at, ullamcorper non, velit. Donec in velit. Sed lacus nisl, vestibulum sed, vehicula et, commodo eu, ligula. Duis vel lacus. In tincidunt. Vestibulum elit. Praesent hendrerit. Suspendisse venenatis.這些文字呈現的樣貌就像隨便翻開的一本歐美小說一樣,「不會重複」,而且「具有閱讀性」(雖然你不可能看出寫了什麼),這就是它被許多人所採用的原因之一了!


